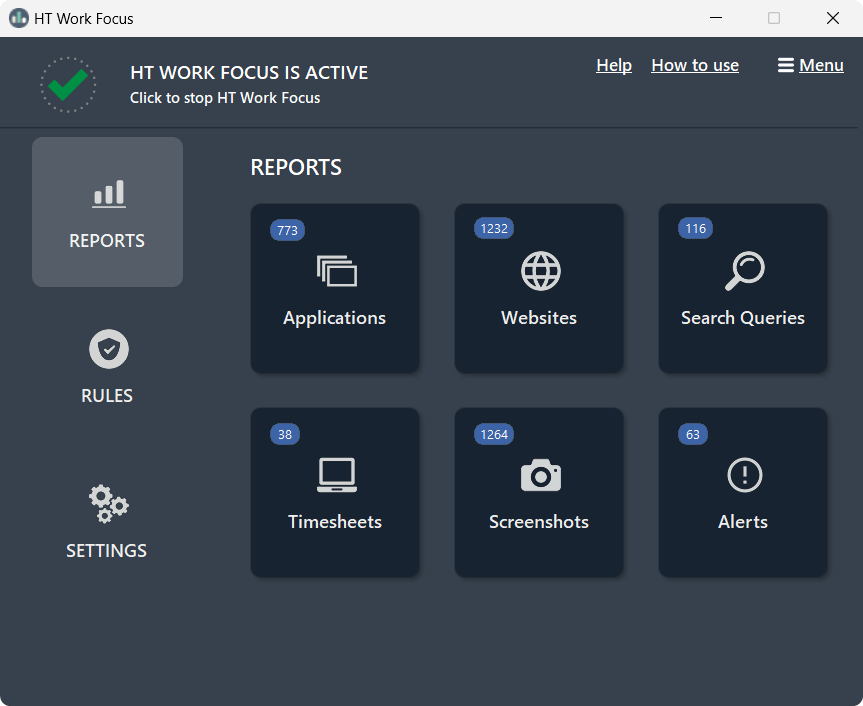
Reports
What types of activity HT Work Focus can monitor
How to get activity reports by email
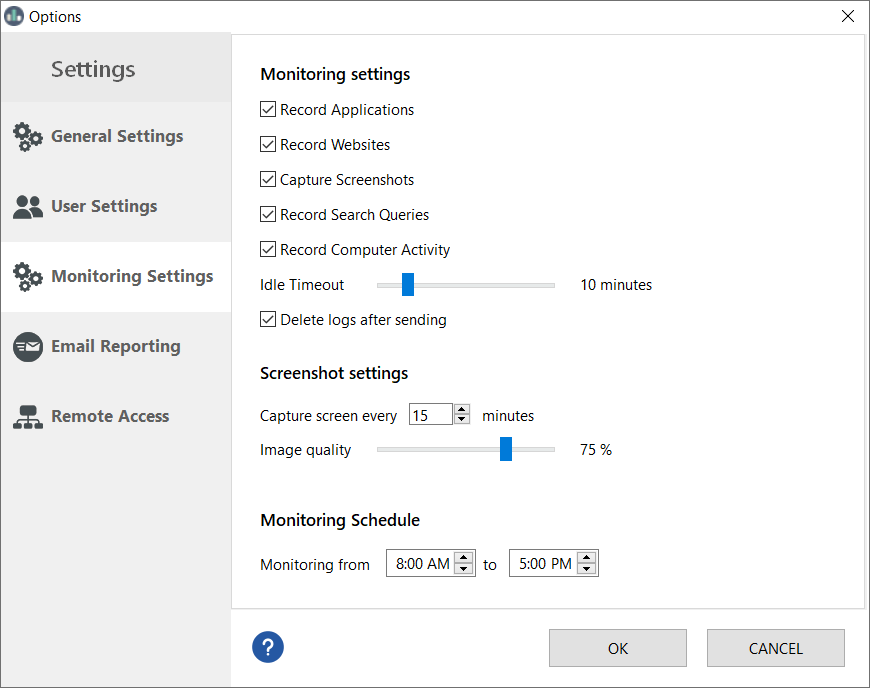
What types of activity HT Work Focus can monitor
HT Work Focus tracks websites, applications, search queries, screenshots, computer sessions, and total time spent on the computer. Reports include two views: History, which shows a chronological timeline of activities, and Charts, which display time spent on each website and application.
Go to Settings → Monitoring Settings and uncheck any activity types you don’t want to monitor.
How to get activity reports by email
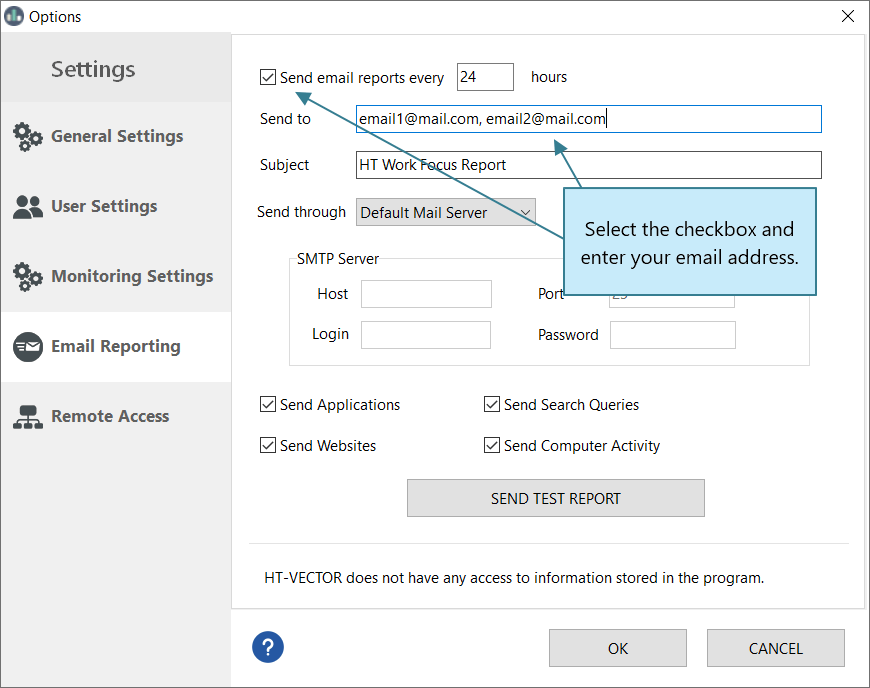
HT Work Focus allows you to receive automatic reports with logs directly to your inbox, keeping you informed without needing to open the app.
- Go to Settings → Email Reporting.
- Check Send email reports choose how often you’d like to receive them.
- Enter your email address.
- Click Send Test Report to ensure everything works correctly.
- (Optional) To send reports to multiple addresses, separate them with commas.
- Enable Delete logs after sending in Settings → Monitoring Settings to avoid duplicate reports.
How to send reports using your own SMTP server
HT Work Focus offers the option to receive the reports via your SMPT server directly, avoiding transferring via our email server.
- Open Rules → Email Reporting.
- Select Send email reports every and specify your email address.
- Choose Send through Custom SMTP Server and specify your SMPT server parameters.
Note! The feature is available only for SMTP email servers that do not use SSL authentication. Usually, this feature is used by corporate customers with their own SMTP servers. It does not support Gmail and other popular email servers with SSL.
Set a Tracking Schedule
Choose exactly when tracking and filtering are active. For instance, keep both on during work hours but disable them during lunch breaks or after work for privacy. You can also turn off only monitoring and leave blocking enabled, or vice versa.
- Go to Settings → General Settings.
- In the Schedule section, select the mode:
- Monitoring & Filtering
- Monitoring Only
- Filtering Only
- Click Set Schedule.
- In the Schedule window, select the days and hours when monitoring or rules should apply. Green means monitoring is on; Red means it is off.
- Click OK to save your changes.